Monitor your Nginx RTMP live-streams
EDIT: UNFORTUNATELY, THIS SETUP NO LONGER WORKS. IT NOW REQUIRES DOCKER. SEE GITHUB PAGE.
Want to monitor your Nginx RTMP live-streams? Using NPM and NodeJS this is actually really easy to do by using the github package mentioned in this guide.
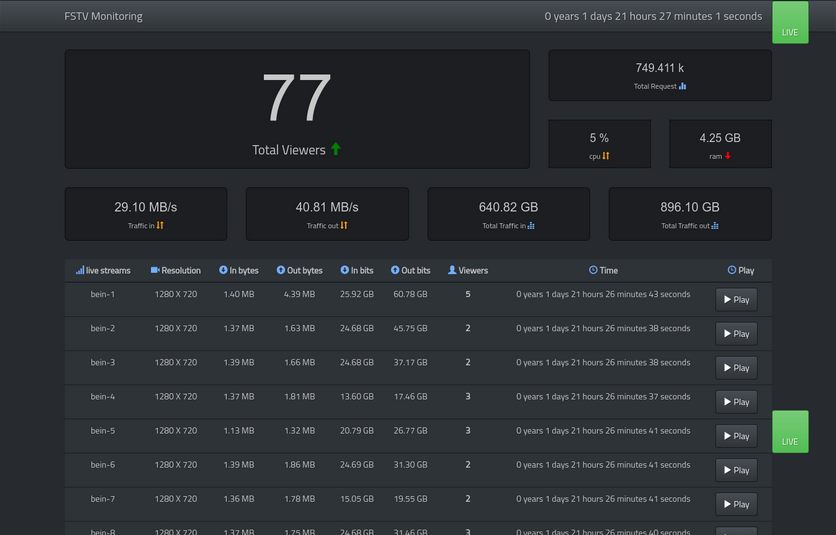
This screenshot is to give you an idea on what to expect from this monitoring tool. It relies on the stat.xsl file that comes with the rtmp module for Nginx.
Step 1
sudo apt install node npm git nginx
sudo apt install libnginx-mod-rtmp
Open either your nginx.conf file, or if you are using more virtual hosts, open the config for the virtual host that you want to use for viewing the monitoring pages. I choose tho use the default virtual hosts config file.
sudo nano /etc/nginx/sites-available/default
Add these lines to it
location /stat {
rtmp_stat all;
rtmp_stat_stylesheet stat.xsl;
}

location /stat.xsl {
root html;
}
location /control {
rtmp_control all;
add_header Access-Control-Allow-Origin * always;
}
We now need to copy the stat.xsl file from the package of the RTMP module for Nginx. So first let's download the package first using git.
Step 2
cd /usr/src
git clone https://github.com/arut/nginx-rtmp-module
Copy the stat.xsl file to the root folder of your website. As an example:
cp /usr/src/nginx-rtmp-module/stat.xsl /var/www/html/stat.xsl
Using the command line go to the folder that we call the root web folder. Or in other words, the location that will contain your files for a website.
cd /opt
Now we need to clone the github package like this:
git clone https://github.com/fiftysoft/nginx-rtmp-monitoring.git
Now go to the folder in the package we just downloaded.
cd nginx-rtmp-monitoring
Step 3
Open the config.json file with your favorite text editor and change these lines: rtmp_server_url, rtmp_server_stream_url, rtmp_server_control_url and the password. Make sure you replace the IP address with your server's IP address.
nano config.json
{
  "site_title":"RTMP Monitoring",
  "http_server_port":9991,
  "rtmp_server_refresh":3000,
  "rtmp_server_timeout":15000,
  "rtmp_server_url":"http://192.168.1.85/stat.xml",
  "rtmp_server_stream_url":"rtmp://192.168.1.85/live/",
  "rtmp_server_control_url":"http://192.168.1.85/control",
  "session_secret_key":"YoursecretKey",
  "username":"admin",
  "password":"YourPassword",
  "language":"en",
  "template":"default",
  "login_template":"login",
  "version":"1.0.2"
}
Now we are ready to install it. We'll use NPM to install it. Like this:
npm install
Step 4
Once that's done, we should be able to start the monitoring server with Node.
node server.js
Now open a web-browser and access the monitor server on port 9991. For example: http://server-ip-address:9991
Use the username and password we've just set in the config.json file. If you haven't done so, then the default username for logging in is admin, and the password 123123.
That completes this guide. A next optional step for you could be to have this automatically start after rebooting the server. Or you could set up a reverse proxy so you can open the monitoring page without having to use the port number. Google will help you further. Good luck!
Source: https://github.com/3m1o/nginx-rtmp-monitoring


Recent Comments