Install Webmin & Nginx module and valid certificates on Ubuntu 20.04
Webmin is an awesome free package that allows you to fully control your Linux server from a web interface. The title says on Ubuntu 20.04 but Webmin runs on any distro of Linux and I believe there's even a Windows version, be it very limited. For me, it is always the very first thing I install on a new server. It does a lot of things by default, but it can do even more when you install some modules. Personally I'm a huge fan and I recommend it to anyone. On several occasions it helped me solve some issues that I was not able to resolve from the command line. So hurray for Webmin!

I'll start by explaining how to install Webmin, it's really super easy. Then I will go into installing modules. And later on I'll explain how to make Webmin accessible on port 80/443 using Nginx reverse proxy. Webmin will run on port 10000 and so you would have to open this port if you want to access Webmin from outside your network. If you don't want to do this, or if you are using a server and are not in control of the firewall, this will also be an option for you. Just copy/paste the commands below in a terminal on your server, and you should be done in like 2 minutes. Now let's get this thing done!
Installing Webmin
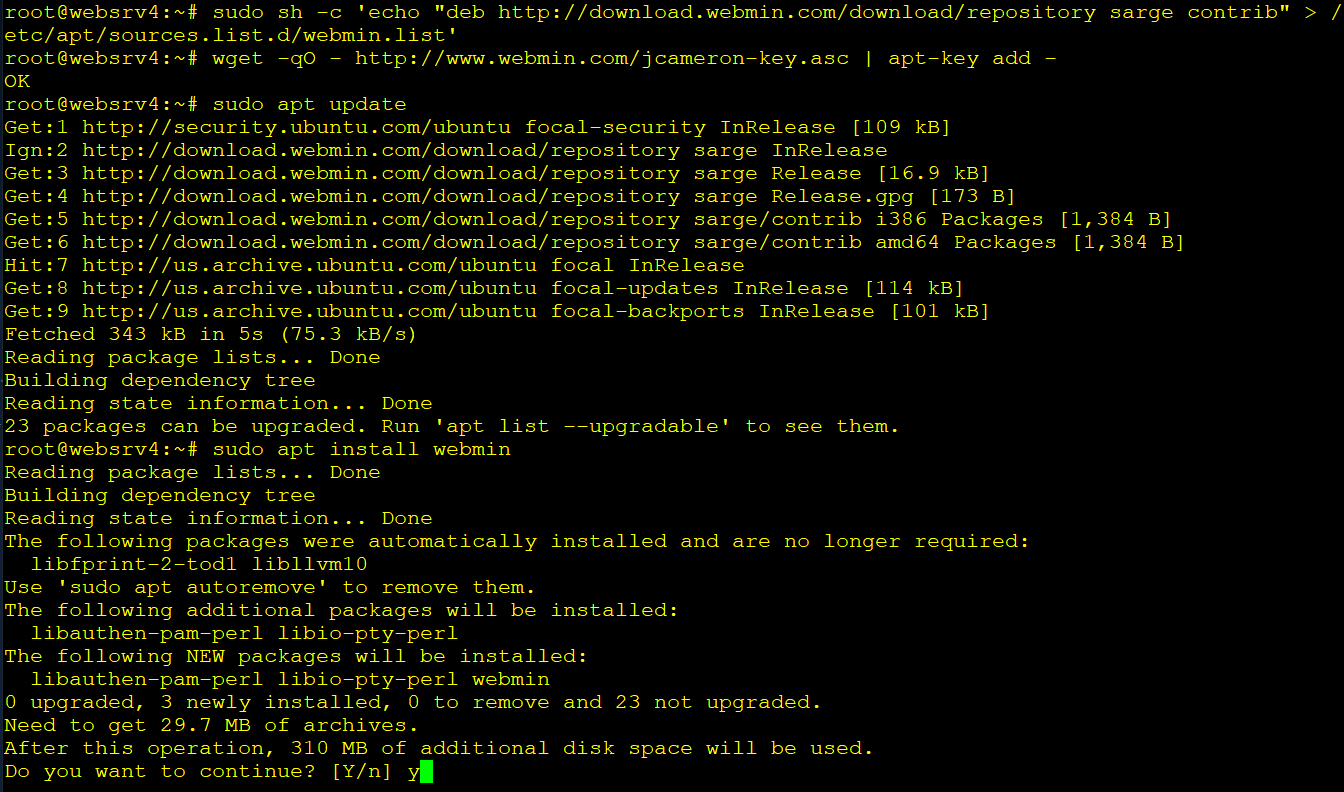
This first command adds the Webmin repository to your server.
sudo sh -c 'echo "deb http://download.webmin.com/download/repository sarge contrib" > /etc/apt/sources.list.d/webmin.list'
The next command download and sets the signing key. Doesn't matter what folder you're in.
wget -qO - http://www.webmin.com/jcameron-key.asc | apt-key add -
Then we need to update our repositories if it hasn't already after adding the first line.
sudo apt update
And the final command is to install Webmin itself. This may take a little while since it will be generating its own certificates.
sudo apt install webmin -y
That's all Sparky! You can now open Webmin in your web browser by your server's IP address or hostname on port 10000. Something like this: https://192.168.1.80:10000. Ignore the certificate warning and just accept and continue.
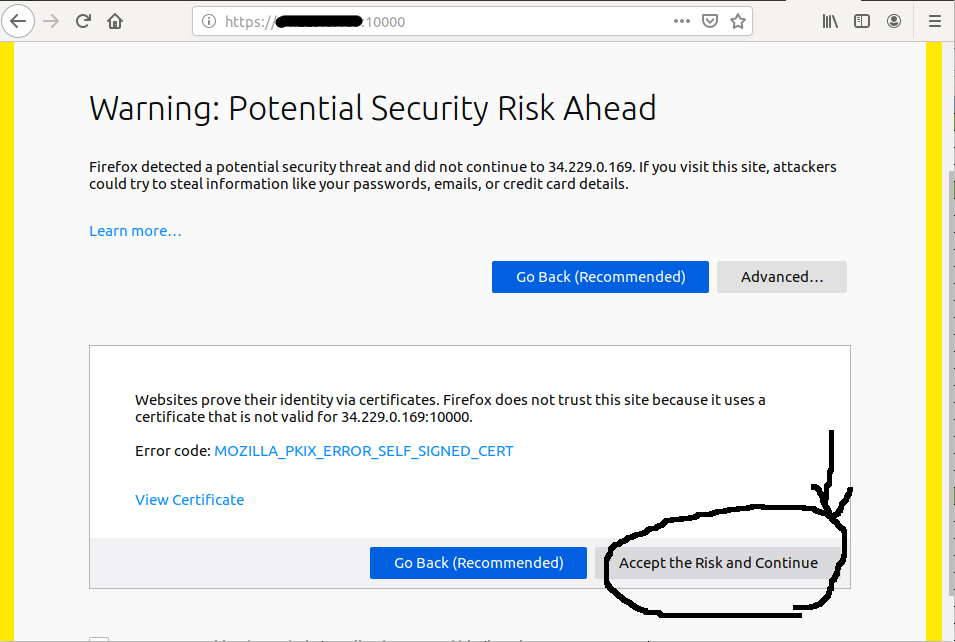
We'll fix that later. Login with your own sudo account for the server, or the root account if you prefer. Start by refreshing the modules, as it will scan your server for services that are running and automatically add them to the web interface.
Using 3rd party modules in Webmin
The most common or popular services will be recognized automatically like Apache, Netdata, Postfix, and many more. Some others require you to install a module manually. An example of this would be Nginx. Below you can see on the screenshots how to install the Nginx module. In the sidebar menu Webmin, go to Webmin configuration,
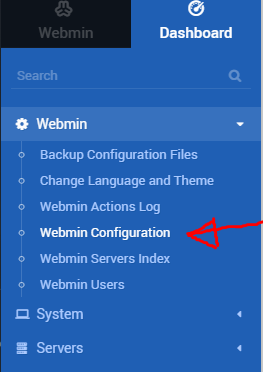
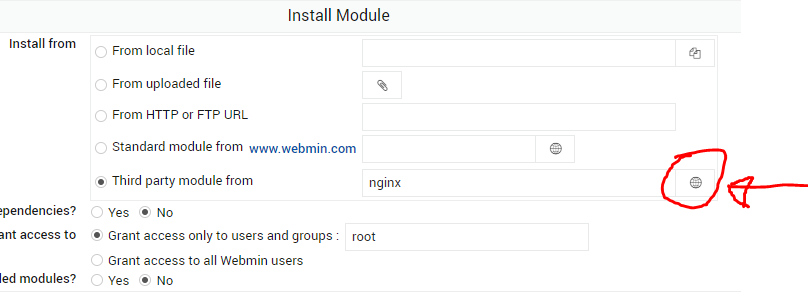
In the sidebar menu Webmin, go to Webmin configuration, and from there somewhere in the middle of the screen go to modules.
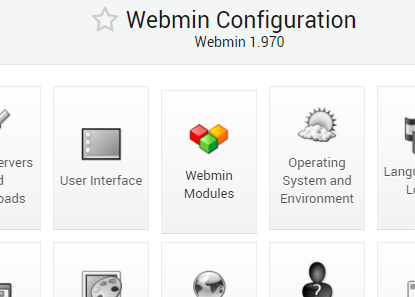
Select Third party module and press the round symbol at the end of the line.
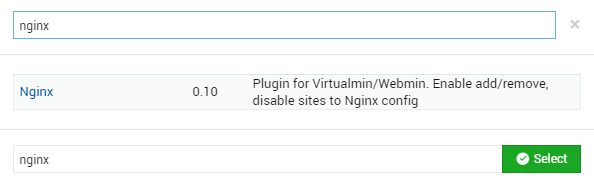
A popup will appear. Search for Nginx and click on it or select it.
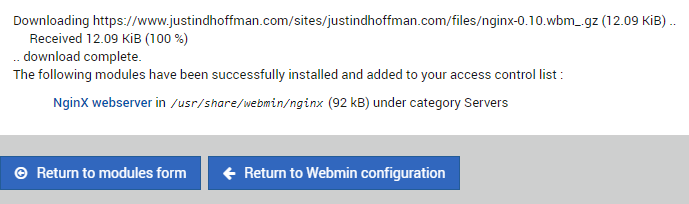
Installing the module will take just a second.
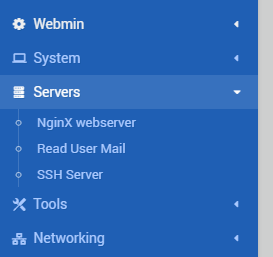
When it's finished, you should see a new menu item in your sidebar under Server called Nginx.
How easy was that? In my country, the Netherlands we have a saying that is fitted here, that goes: A child can do the laundry. But in a different language this makes absolutely no sense at all.
Obtain valid certificates from Letsencrypt
If you don't want to see the certificate error message when you open the web page for Webmin, you can do so by installing a certificate by Letsencrypt. One requirement for this is to have port 80 open, and a domain name pointing to your external IP address. Once you have that set, just follow these steps.
Go to Webmin configuration again, and then go to SSL encryption.
Go to the Let's encrypt tab all the way to the right.

The window to actually request your certificate looks like the screenshot below. Just enter a valid, working hostname that is pointing to your server, and you should be good to request a certificate! Webmin automatically switches from the old to the new certificate so you will need to log in again. But this time you will no longer get the warning message.
Use Nginx to reverse proxy sub folder traffic for Webmin
Basically, you have three choices for using Nginx as a reverse proxy for Webmin. Use a primary domain, like example.com, or use a subdomain like webmin.example.com or as a sub folder like example.com/webmin. We'll be using the last one in this example. This way later on we can easily add more apps without the need to have a subdomain for all of them.
sudo nano /etc/nginx/sites-available/example.com.conf
server {
    server_name  example.com;
    ....
    ....
    location / {
        root   /var/www/example.com/html;
        index  index.html index.htm;
        ...
        ...
    }

    location /webmin/ {
	# proxy_buffering off;
	proxy_pass http://127.0.0.1:10000/;
	proxy_set_header Host $host;
	proxy_set_header X-Forwarded-For $http_x_forwarded_for;
	proxy_redirect http://$host:10000/ http://$host/webmin/;
    }
    ....
}
We also need to configure Webmin to accept connections from Nginx. We can configure Webmin for the subdirectory by editing /etc/webmin/config and add the lines shown below.
sudo nano /etc/webmin/config
.....
.....

relative_redir=0
referers=example.com
webprefix=/webmin
webprefixnoredir=1
Then we open the file /etc/webmin/miniserv.conf and change the variables as shown below.
sudo nano /etc/webmin/miniserv.conf
...
ssl=0
...
...
ssl_redirect=0
And of course we need to restart Webmin to load our changes.
sudo systemctl restart webmin
Now we can access Webmin using the sub directory by going to https://www.example.com/webmin/.
That concludes this tutorial! Good luck! Questions? Leave a comment.


Recent Comments