Build a live-stream server on Ubuntu 18.04
!! THIS GUIDE IS RATHER OUT-DATED. YOU MAY WANT TO HAVE A LOOK AT A MORE RECENT GUIDE ON THE WEBSITE YOU ARE CURRENTLY VISITING
This guide will show you step by step how to install Nginx webserver & Certbot SSL certificates, the RTMP module, Ffmpeg on a Ubuntu 18.04 VPS server. (WILL ALSO WORK ON UBUNTU 20.4). It will then will also explain how to setup HLS live-streaming and create a webpage with Video.JS to show the live-stream.
I decided to write this guide after receiving a lot of questions and responses on a video or two that I made a while ago. HLS and SSL related mostly. So hopefully this guide will clear up all of those questions for you all. If not, please leave any questions at the bottom of this page or as comment on the Youtube page.
This guide contains 7 steps. I strongly advice to read through them all beforehand so you'll know what you're doing in stead of just blindly start copy/pasting everything, because that rarely works out like it should, in my experience. This looks like a long-ass guide, and it is in a way, but you could do this all in under 25 minutes. Anyways, it's too long for this blog's layout so click on the continue reading link below to read the full article and to see the video.
EDIT 24-07-2020 - Take a look at the git repo for easy hls site instal by Quinn Ebert. He has created it based on my guide and video. Thanks Quinn! Good work 🙂
TIP! Please use a fresh install for Ubuntu 18.04 so you won't run in to any conflicts or other issues.
Let's get started! So you've installed your server or VPS with Ubuntu 18.04, and you're now logged in to the local console or through SSH from a remote location. Let's start of by making sure the system is up to date.
sudo apt update && sudo apt upgrade
1: Install Nginx + RTMP module.
sudo apt install -y nginx
sudo apt install -y libnginx-mod-rtmp
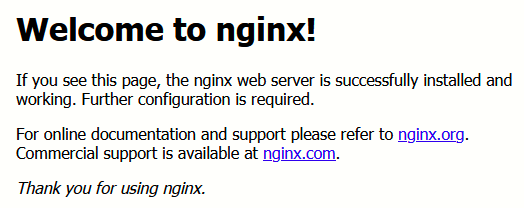
When you enter the IP address of your server in your web-browser you should now see a default Nginx webpage.
2: Installing required & additional software.
Add Certbot repository to our server so it will install the version we want later on.
sudo apt install -y software-properties-common
sudo add-apt-repository ppa:certbot/certbot
Add architecture for i386 because we will need it later on when we're going to install additional codecs.
sudo dpkg --add-architecture i386
sudo apt update
We're ready to start installing a bunch of additional, required software, and please be aware that it might take several moments to complete.
sudo apt install wget nano python-certbot-nginx ufw unzip software-properties-common dpkg-dev git make gcc automake build-essential joe ntpdate zlib1g-dev libpcre3 libpcre3-dev libssl-dev libxslt1-dev libxml2-dev libgd-dev libgeoip-dev libgoogle-perftools-dev libperl-dev pkg-config autotools-dev gpac ffmpeg sysstat nasm yasm mediainfo mencoder lame libvorbisenc2 libvorbisfile3 libx264-dev libvo-aacenc-dev libmp3lame-dev libopus-dev libfdk-aac-dev libavcodec-dev libavformat-dev libavutil-dev g++ libc6:i386 freeglut3-dev libx11-dev libxmu-dev libxi-dev libglu1-mesa libglu1-mesa-dev
The following two steps are totally optional!! It includes PHP, MySQL or MariaDB, PhpMyAdmin. Please refer to my Youtube video to see more information on this.
sudo apt install mariadb-server mariadb-client phpmyadmin php php-cgi php-common php-pear php-mbstring php-fpm
3: Setup a firewall and perform other required steps.
Next we'll be performing various required steps and setup our UFW firewall. We're going to start with downloading the RTMP module source files because we need a certain file from it that we need to copy to /var/www/html.
cd /usr/src
git clone https://github.com/arut/nginx-rtmp-module
cp /usr/src/nginx-rtmp-module/stat.xsl /var/www/html/stat.xsl
Create the file 'crossdomain.xml' in /var/www/html folder, and paste in it what you see below.
sudo nano /var/www/html/crossdomain.xml
<?xml version="1.0"?>
<!DOCTYPE cross-domain-policy SYSTEM "http://www.adobe.com/xml/dtds/cross-domain-policy.dtd">
<cross-domain-policy>
<allow-access-from domain="*"/>
</cross-domain-policy>
Create the file 'info.php' in /var/www/html folder, and paste in it what you see below.
sudo nano /var/www/html/info.php
<?php
phpinfo();
?>
If you want to display an image whenever people open your web page while you are not streaming, make sure it's a jpg file with resolution 1280x720 or 1920x1080, placed in /var/www/html and named "poster.jpg"
For testing purposes you can always use a random publicly available poster from the web like the one I used for this guide:
wget -O /var/www/html/poster.jpg https://i.imgur.com/gTeWLDO.jpg
Create these folders. You can choose a different location but remember to also change the locations in the Nginx config files.
sudo mkdir /var/livestream
sudo mkdir /var/livestream/hls
sudo chown -R www-data: /var/livestream
Now it's about time to install our firewall. UFW is commonly used and should already be installed. If this is not the case do "sudo apt install ufw" first.
ufw status
sudo ufw allow 22/tcp
sudo ufw allow 80/tcp
sudo ufw allow 443/tcp
sudo ufw allow 10000/tcp
sudo ufw allow 1935/udp
Port 1935 is the one that RTMP uses so we need to open that on the firewall and perhaps in some cases you will also need to forward the port on your router.
To make things easy for yourself if you are setting up your server from a remote location is to add the external IP address of your remote location to the allow list. Before enabling the firewall, make VERY SURE that you've allowed yourself access to the server on your SSH port, or else you're going to lock yourself out of the server.
sudo ufw allow from XX.XX.XX.XX
sudo ufw enable
sudo ufw status verbose
4: Edit Nginx configuration.
sudo nano /etc/nginx/nginx.conf
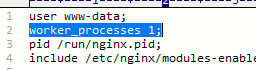
On line 2 change the worker_processes option from auto to 1, so it says: worker_processes 1;
Scroll all the way down and add the following at the end of the file, or something similar if you're situation requires other variables (use your brain 🙂
rtmp {
        server {
                listen 1935;
                chunk_size 8192;
	application live {
		live on;
		interleave off;
		meta on;
		wait_key on;
		wait_video on;
		idle_streams off;
		sync 300ms;
		session_relay on;
		allow publish all;
		allow play all;
		max_connections 1000;
		## == FORWARD STREAM (OPTIONAL) == ##
		# == == TWITCH RE-STREAM == == #
		# push rtmp://live-ams.twitch.tv/app/LIVESTREAM_KEY;
		# == == YOUTUBE RE-STREAM == == #
		# push rtmp://a.rtmp.youtube.com/live2/LIVESTREAM_KEY;
		# == == MIXER.com RE-STREAM == == #
		# push rtmp://ingest-ams.mixer.com:1935/beam/LIVESTREAM_KEY;
		publish_notify off;
		# play_restart off;
		# on_publish http://your-website/on_publish.php;
		# on_play http://your-website/on_play.php;
		# on_record_done http://your-website/on_record_done.php;

		## == HLS == ##
		hls off;
		# hls_nested on;
		# hls_path /var/livestream/hls/live;
		# hls_base_url http://;
		# hls_playlist_length 60s;
		# hls_fragment 10s;
		# hls_sync 100ms;
		# hls_cleanup on;
		## == DASH == ##
		dash off;
		# dash_nested on;
		# dash_path /var/livestream/dash;
		# dash_fragment 10s;
		# dash_playlist_length 60s;
		# dash_cleanup on;
		push rtmp://localhost/hls;
		}

	application hls {
		live on;
		allow play all;
		hls on;
		hls_type live;
		hls_nested on;
		hls_path /var/livestream/hls;
		hls_cleanup on;
		hls_sync 100ms;
		hls_fragment 10s;
		hls_playlist_length 60s;
		hls_fragment_naming system;
		}
	}
}nginx -t
sudo systemctl restart nginx
sudo nano /etc/nginx/sites-available/default
server {
listen 80 default_server;
listen [::]:80 default_server;
# listen 443 ssl http2 default_server;
# listen [::]:443 ssl default_server;
# include snippets/snakeoil.conf;
keepalive_timeout 70;
gzip off;
root /var/www/html;
# Add index.php to the list if you are using PHP
index index.php index.nginx-debian.html index.html index.htm;
server_name _;
# add_header Strict-Transport-Security "max-age=63072000;";
# add_header X-Frame-Options "DENY";
location / {
location ~* \.m3u8$ {
add_header Cache-Control no-cache;
}
add_header Access-Control-Allow-Origin *;
# First attempt to serve request as file, then as directory, then fall back to displaying a 404.
try_files $uri $uri/ =404;
}
location ~ \.php$ {
include snippets/fastcgi-php.conf;
# # With php-fpm (or other unix sockets):
fastcgi_pass unix:/var/run/php/php7.2-fpm.sock;
# # With php-cgi (or other tcp sockets):
# fastcgi_pass 127.0.0.1:9000;
}
## deny access to .htaccess files, if Apache's document root concurs with nginx's one
#location ~ /\.ht {
# deny all;
#}
## This provides RTMP statistics in XML at
location /stat {
rtmp_stat all;
rtmp_stat_stylesheet stat.xsl;
# auth_basic "Restricted Content";
# auth_basic_user_file /etc/nginx/.htpasswd;
}
## XML stylesheet to view RTMP stats. Copy stat.xsl wherever you want and put the full directory path here
location /stat.xsl {
root /var/www/html/;
}
}nginx -t
sudo systemctl restart nginx
Obviously you need to change the DOMAIN part in the next lines to whatever your domain name is.
sudo nano /etc/nginx/sites-available/DOMAIN.net.conf
Add the following to this new file, but don't forget to change DOMAIN first!
server {
listen 80;
listen [::]:80;
root /var/www/html;
server_name DOMAIN.net www.DOMAIN.net;
}nginx -t
If everything is good and we don't see any error messages we can create the symlink to the config file so it will be activated for Nginx. Use your brain and edit the DOMAIN parts.
ln -s /etc/nginx/sites-available/DOMAIN.net.conf /etc/nginx/sites-enabled/DOMAIN.net.conf
nginx -t
sudo systemctl restart nginx
5: Confirm that the RTMP stream works.
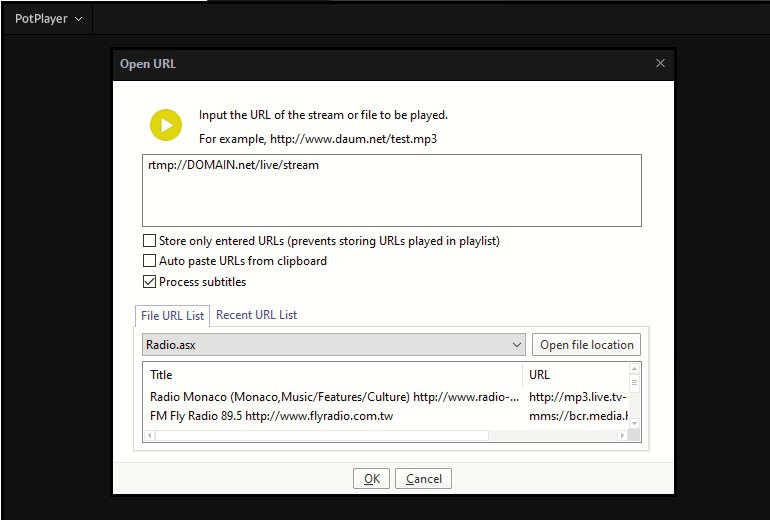
At this point you could try to test if you can live-stream to your server using OBS or any other live-stream app. In your config use something similar as shown below.
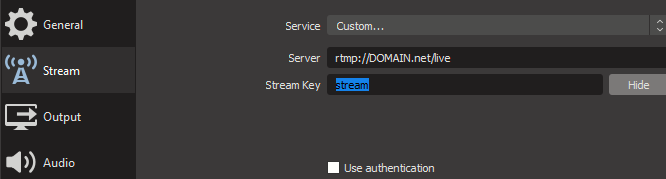
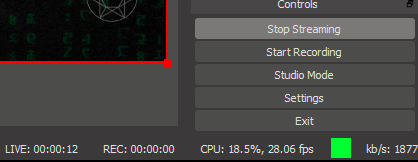
You can check the status bar in OBS to check if you are able to connect and stream to the server. When it shows something similar to this, you're good.
Our stat page at should now show one live RTMP source. Now you should already be able to watch the livestream using VLC Player or PodPlayer or any other media player that can play media from URL's. Open it in your player like this: rtmp://DOMAIN.net/live/stream
It might take a couple of seconds but it should start loading the livestream video. If all works fine, we can continue to the next chapter. You're doing great so far by the way! 🙂
6: Create SSL certificates for Nginx
This first step is not required, but I advise you to go through it anyway because if you want to get tripple A++ rated certificates for your website, this will be required (see www.ssllabs.com/ssltest for info). The next command might take five minutes and probably even more (depending on your processing power ofc).
sudo openssl dhparam -out /etc/ssl/certs/dhparam.pem 4096
Now for the creation of the actual certificates for your domain. Use brain here!
sudo certbot --nginx -d DOMAIN.net -d www.DOMAIN.net
You will be asked to enter your e-mail address and two or three other questions. Don't choose to enable the auto forward for http to https. You can always set this up later.
If everything went fine, you should see the location of the newly created certificates. Keep these in mind. Don't forget to add a crontab so the certificates get renewed automatically in time.
sudo crontab -e
0 12 * * * /usr/bin/certbot renew --quietWe're going to edit the /etc/nginx/sites-available/DOMAIN.net.conf file that we've created earlier on.
sudo nano /etc/nginx/sites-available/DOMAIN.net.conf
Remove everything in this file, and afterwards paste the following:
server {
	listen 80;
	listen [::]:80;
	server_name YOURDOMAIN.COM;
	# redirect all http to https
        return 301 https://$server_name$request_uri;
}
server {
	listen 443 ssl http2;
	listen [::]:443 ssl;
        server_name YOURDOMAIN.COM;
	# include snippets/snakeoil.conf;
	keepalive_timeout 70;
	gzip off;
	root /var/www/html;
	# Add index.php to the list if you are using PHP
	index index.php index.nginx-debian.html index.html index.htm;
	ssl_certificate /etc/letsencrypt/live/DOMAIN.COM/fullchain.pem;
	ssl_certificate_key /etc/letsencrypt/live/DOMAIN.COM/privkey.pem;
	ssl_trusted_certificate /etc/letsencrypt/live/DOMAIN.COM/chain.pem;
	ssl_dhparam /etc/ssl/certs/dhparam.pem;
	ssl_protocols TLSv1.2 TLSv1.3;
	ssl_session_cache shared:le_nginx_SSL:1m;
	ssl_session_timeout 1440m;
	ssl_prefer_server_ciphers on;
	ssl_session_tickets off;
	ssl_stapling off;
	ssl_stapling_verify on;
	resolver 8.8.8.8 8.8.4.4 valid=300s;
	resolver_timeout 5s;
	ssl_ecdh_curve secp384r1;
	ssl_ciphers "EECDH+AESGCM:EDH+AESGCM:ECDHE-RSA-AES128-GCM-SHA256:AES256+EECDH:DHE-RSA-AES128-GCM-SHA256:AES256+EDH:ECDHE-RSA-AES256-GCM-SHA384:DHE-RSA-AES256-GCM-SHA384:ECDHE-RSA-AES256-SHA384:ECDHE-RSA-AES128-SHA256:ECDHE-RSA-AES256-SHA:ECDHE-RSA-AES128-SHA:DHE-RSA-AES256-SHA256:DHE-RSA-AES128-SHA256:DHE-RSA-AES256-SHA:DHE-RSA-AES128-SHA:ECDHE-RSA-DES-CBC3-SHA:EDH-RSA-DES-CBC3-SHA:AES256-GCM-SHA384:AES128-GCM-SHA256:AES256-SHA256:AES128-SHA256:AES256-SHA:AES128-SHA:DES-CBC3-SHA:HIGH:!aNULL:!eNULL:!EXPORT:!DES:!MD5:!PSK:!RC4";
	add_header Strict-Transport-Security "max-age=63072000;";
	add_header X-Frame-Options "DENY";
	location / {
		location ~* \.m3u8$ {
		add_header Cache-Control no-cache;
		}
		add_header Access-Control-Allow-Origin *;
	# First attempt to serve file, then as directory, then a 404.
		try_files $uri $uri/ =404;
	}
	# pass PHP scripts to FastCGI server
	location ~ \.php$ {
		include snippets/fastcgi-php.conf;
	#	# With php-fpm (or other unix sockets):
		fastcgi_pass unix:/var/run/php/php7.2-fpm.sock;
	#	# With php-cgi (or other tcp sockets):
	#	fastcgi_pass 127.0.0.1:9000;
	}
	# deny access to .htaccess files, if Apache's document root concurs with nginx's one

	#location ~ /\.ht {
	#	deny all;
	#}
# This provides RTMP statistics in XML at http://your-server-address/stat
location /stat {
	rtmp_stat all;
	rtmp_stat_stylesheet stat.xsl;
	# auth_basic "Restricted Content";
        # auth_basic_user_file /etc/nginx/.htpasswd;
	}
# XML stylesheet to view RTMP stats. Copy stat.xsl wherever you want and put the full directory path here
location /stat.xsl {
	root /var/www/html/;
	}
# Control interface (extremely useful, but can also boot people from streams so we put basic auth in front of it - see https://github.com/arut/nginx-rtmp-module/wiki/Control-module for more info
#location /control {
	# you'll need a htpasswd auth file, that's outside the scope of this doc but any apache one will work
	# auth_basic "Restricted Content";
	# auth_basic_user_file /etc/nginx/.htpasswd;
	#rtmp_control all;
	#}
#creates the http-location for our full-res desktop HLS stream "http://my-ip/live/my-stream-key/index.m3u8"
location /live {
	# root /var/livestream/hls;
	alias /var/livestream/hls;
	expires -1;
	autoindex on;
	autoindex_localtime on;
	# CORS setup #
		set $sent_http_accept_ranges bytes;
		add_header 'Cache-Control' 'no-cache';
		add_header Cache-Control no-cache;
		add_header 'Access-Control-Allow-Origin' '*' always;
		add_header 'Access-Control-Expose-Headers' 'Content-Length';
	# allow CORS preflight requests #
		if ($request_method = 'OPTIONS') {
		add_header 'Access-Control-Allow-Origin' '*';
		add_header 'Access-Control-Max-Age' 1728000;
		add_header 'Content-Type' 'text/plain charset=UTF-8';
		add_header 'Content-Length' 0;
		return 204;
		}
	types {
		application/vnd.apple.mpegurl m3u8;
		application/dash+xml mpd;
		video/mp2t ts;
		}
	}
}nginx -tsudo systemctl restart nginx
6: Video.js installation & and example index.html
Video.js can do a lot of extra things that I won't go in to right now, so you should investigate yourself at https://github.com/videojs.
Create a new sub-folder in /var/www/html called videojs and enter this folder.
sudo mkdir /var/www/html/videojs
cd /var/www/html/videojs
wget https://github.com/videojs/video.js/releases/download/v7.7.6/video-js-7.7.6.zip

wget https://github.com/videojs/http-streaming/releases/download/v1.13.1/videojs-http-streaming.js
Optional! wget https://github.com/videojs/videojs-contrib-dash/releases/download/v2.11.0/videojs-dash.js
unzip /var/www/html/videojs/video-js-7.7.6.zip
chown -R www-data: /var/www/html
ls -la /var/www/html/videojs
The previous command should show something like what is shown below.

Now we're going to create a file that will show the video.js player. You can name it whatever you want but here I'll be naming it "index.html"
sudo nano /var/www/html/index.html
<html>
<head>
<script src='https://DOMAIN.net/videojs/video.js'></script>
<script src="https://DOMAIN.net/videojs/videojs-http-streaming.js"></script>
<meta charset=utf-8 />
<title>LiveStream</title>
<link href="https://DOMAIN.net/videojs/video-js.min.css" rel="stylesheet">
<!-- <link href="https://DOMAIN.net/videojs/videojs-sublime-skin.min.css" rel="stylesheet"> -->
<!-- <link href="https://DOMAIN.net/videojs/videojs-sublime-skin.css" rel="stylesheet"> -->
<!-- <link href="https://DOMAIN.net/videojs/video-js.css" rel="stylesheet"> -->
<!-- <link href="https://DOMAIN.net/videojs/videojs-skin-twitchy.css" rel="stylesheet" type="text/css">  -->
</head>
<body>
<center>
<video-js id="live_stream" class="video-js vjs-fluid vjs-default-skin vjs-big-play-centered" controls preload="auto" autoplay="true" width="auto" height="auto" poster="https://DOMAIN.net/poster.jpg">
<source src="https://DOMAIN.net/live/stream/index.m3u8" type="application/x-mpegURL">
    <p class='vjs-no-js'>
      To view this video please enable JavaScript, and consider upgrading to a web browser that
      <a href='https://videojs.com/html5-video-support/' target='_blank'>supports HTML5 video</a>
    </p>
</video-js>

  <script>
    var player = videojs('live_stream');
	player.play();
  </script>
</center>
</body>
</html>chown -R www-data: /var/www/htmlWe're basically done! Now it's time to see if it all works. Streaming to your server and open your website or the file we've just created at: https://DOMAIN.net/index.html
Thanks for following my guide. Please report any issues and you can leave questions or other remarks on this page or the Youtube page of the video.
I posted all the commands in a pastebin right here. https://pastebin.com/qMCpKYC8


Thank you very much!
This was exactly what I was looking for!
The only thing I changed was the authentication. I'm using Nginx auth_request module + Vouch + Gitea to restrict access to the stream.
Do you have some ideas on how to add subtitles, different audio-tracks or improve latency?
Subtitles? Oh that's a good one! I know that ffmpeg can do subtitles. I'm not sure if there's a already existing solution to what your wishes are, I should google that. But I dó know that somehow it must be possible. Good luck with that! If I learn anything on the subject I'll share it.
Latency is indeed a thing... The RTMP stream is pretty good and acceptable with the latency but the HLS stream not really. In all honesty I have no idea, yet, on how to improve this. My clueless first guess would be, upgrade the live-stream server's processing power. Although I don't think that will be the solution. I'm gonna look into this because it is something I am actually also interested to learn more on. Keep an eye out for any new posts on the subject!
i would love to hear more about how you handled the user access! i would like to do something like that myself.
Oh je bent gewoon een Nederlander zie ik nu. Hahah had ik dat maar geweten voor ik de vorige reactie plaatste.
The way I've set it up is not so much by allowing denying certain people, but their IP addresses. I still have it on my to do list to find a better way that does use usernames and force logins. But for now I did some minor restrictions like this:
rtmp {server {
listen 1935;
application live {
live on;
sync 300ms;
max_connections 200;
allow publish 127.0.0.1;
allow publish 192.168.2.0/24;
allow publish 192.168.1.0/24;
# allow publish all;
allow play 127.0.0.1;
allow play 192.168.2.0/24;
allow publish 192.168.1.0/24;
deny play all;
# allow play all;
Unfortunately having the same error. What additional details do you need, so as to avoid a core dump. =)
Hey Andre,
I having the same problem.
The Error is showing when I am on the http://STREAMINGSERVER/index.html.
"The media could not be loaded, either because the server or network failed or because the format is not supported."
Sometimes, it doesn't show this message. But then the Viedeo isn't loading. Just the loading animation, again and again.
For your information I skipt the SSL part.
Have a look at these two pages
https://smartshitter.com/musings/2017/12/nginx-rtmp-streaming-with-simple-authentication/
https://smartshitter.com/musings/2018/06/nginx-rtmp-streaming-with-slightly-improved-authentication/
5 Seconds is the goal right now its close to 60 seconds.
What step can i take to reduce this delay. What will affect the delay being so long.
thanks
Hey, Welke porten moeten allemaal open om te kunnen uitzenden vanaf buitenhuis?
Hello Thanks for this !! Regards from Chile
i have a Problem with
ln -s /etc/nginx/sites-available/mydomain.com.conf /etc/nginx/sites-enabled/mydomain.com.conf
No such file or directory
Thanks for your time ! 😉
Hello Andre! me again 🙂 , how add application in nginx additional to live?Example:
application a {}
application b {}
could you teach me please 🙂
Why i have this error?
"The media could not be loaded, either because the server or network failed or because the format is not supported."
Could you make a guide on how to restream or relay an incoming RTMP stream to multiple providers?
I'm thinking about buying the Panasonic AG-CX10 for my church but it only supports a single RTMP endpoint. Having the options to relay it to multiple providers would be very nice.
Yes this is possible. And it's exactly as you already pointed out yourself.
application live {live on;
interleave off;
meta on;
sync 300ms;
session_relay on;
max_connections 200;
allow publish all;
allow play all;
}
application yourapp {
live on;
}
Hey, thank for the nice guide.
I'm up and running with my private twitch.
One or two things though,
How can set the lag to less than 5 seconds?
Like when and where do you see this error? What do your config files look like. Stuff like that.
I did not do the domain part just wanted to test out via the IP version. So I can stream from OBS and view from VLC but when I try to access the website via index.html there is no video.js player. just shows the message to view this video please enable javascript. Tried on an iphone,android, pc with different browsers same message. And I can only reach the server via HTTP Im guessing since I skipped the domain ant certificate portions. Where can Troubleshoot this problem? Because I tried hosting this on digital ocean.
This is awesome, exactly what I was looking for, thank you so much!!!
Thank you so much for the tutorial. I have completed all steps successfully as far as I can tell, and I can view on http site, but if I change to https it will not load - and I need https so I can embed the stream on our website (it will not allow embedding insecure site).
Hello, thanks you so much for post. I success follow setup stream with you, I can ask how to CORS multiple domain because I tried in the Crossdomain. xml file But it doesn't work
Solved. 🙂
can you detail what you did to solve that? I noticed that it wouldnt load my index.html automatically after the ssl stuff, is there a change on the ssl redirect somewhere.?
thanks in advance
Another alternative I’ve found is MediaCP panel this offers RTMP and also shoutcast etc very easy to use
hi good day
it works for me with rtmp in vlc player and not when i used m3u8 based on your documentation and video
i am using https://bcast.cobrasoftwares.org
can you advice ?
Old comment, I know. But if anyone else runs into this issue, what I did was uncomment lines 39-41 of the DOMAIN.net.conf file, and change line 39 from https to http:
```
if ($scheme != "http") {
return 301 https://$host$request_uri;
}
```
Hope this helps!
I worked through your very detailed instructions and I now have the server running very smoothly with live streams through my network. For whatever reason it doesn't pick up the default index.html but loads it when I put it ion the URL, I know I got confused with apache and Nginx etc.
Anyway thanks for your hard work, my young boy is super pleased I got him a streaming platform for his OBS and his games, all his friends commented on the quality.
Q. If I wanted to stream a second channel, do I have to install another instance do I just modify/copy the index.html into another like stream2.html and what would need to be changed?
Thank you for publishing this it is greatly appreciated.
Thanks for this. I'll have a look at the guide again and use this to edit it.
Yep my config was not good. I had it commented out because of that. I just now noticed what the issue was before. I used "if ($scheme != “https”) {" and of course this needed to be http instead of https.
So thanks again Justin!
Thank you
I’m not familiar with that one yet. Investigate it I must!
edit:
Hmm that package is a bit too expensive for me!!
Hi,
tnx for the tutorial.
I'm using an AWS (amazon) server and I'm getting some error:
- the procedure to obtain an SSL certificate, when I put in terminal the command "sudo certbot --nginx -d ec2-3-21-241-87.us-east-2.compute.amazonaws.com"
the terminal say:
An unexpected error occurred:
Error creating new order :: Cannot issue for "ec2-3-21-241-87.us-east-2.compute.amazonaws.com": The ACME server refuses to issue a certificate for this domain name, because it is forbidden by policy
and so I cannot configure the default with SSL.
Also if I try to see the stat I obtain ever 404error.
at the same time trying to see the js player I have, on all browser I tested on more than 1 pc or Mac, that "To view this video please enable JavaScript, and consider upgrading to a web browser that supports HTML5 video".
May you help me? I'm newbie to linux...
Tnx again.
I am trying to stream video using nginx.
I' have compiled NGINX on UBUNTU 20 with rtmp module. This the ffmpeg command i use to start streaming:
ffmpeg -re -i "myvideo.mp4" -vcodec h264 -acodec aac -b:a 300k -bufsize 10M -ar 48000 -strict -2 -f flv rtmp://localhost/hls/stream
In VLC i open this url: http://MY_IP:8080/tv/stream.m3u8, but doesn't work. What am I doing wrong?
The configuration of my nginx.cof is this:
user www-data;
worker_processes 1;
#error_log logs/error.log;
#error_log logs/error.log notice;
#error_log logs/error.log info;
#pid logs/nginx.pid;
events {
worker_connections 1024;
}
rtmp {
server {
listen 1935;
chunk_size 8192;
application hls {
live on;
allow play all;
hls on;
hls_type live;
hls_nested on;
hls_path /mnt/hls;
hls_cleanup on;
hls_sync 100ms;
hls_fragment 10s;
hls_playlist_length 60s;
hls_fragment_naming system;
}
}
}
http{
include mime.types;
default_type application/octet-stream;
log_format main '$remote_addr - $remote_user [$time_local] "$request" '
'$status $body_bytes_sent "$http_referer" '
'"$http_user_agent" "$http_x_forwarded_for"';
sendfile off;
tcp_nopush on;
server {
listen 8080 default_server;
listen [::]:8080 default_server;
keepalive_timeout 70;
gzip off;
root /mnt/hls;
server_name _;
# add_header Strict-Transport-Security "max-age=63072000;";
# add_header X-Frame-Options "DENY";
location /tv {
types {
application/vnd.apple.mpegurl m3u8;
}
location ~* .m3u8$ {
add_header Cache-Control no-cache;
}
add_header Access-Control-Allow-Origin *;
# First attempt to serve request as file, then as directory, then fall back to displaying a 404.
try_files $uri $uri/ =404;
}
}
}
This worked perfectly for the default website thank you!
I am trying to add another website to this server to stream to.
Could you give me the config or basic steps to host another streaming site on this server?
Apologies for asking I tried and failed.
Hi there andre love the tutorial, top guy, my question is how can i configure to have more then the one stream as i have djs wanting to have there own streams if you understand?
Im having issues when running this guide on a dedicated server but it’s fine on a vps running same is Ubuntu 18.04
Hey Andre, thanks a bunch man! Appreciate your efforts and I dig your blog, brother. Keep up the great work!
Top Tutorial maar ik loop steeds vast bij het installeren van de certificaten. Zonder de HTTPS certificaten werkt het maar ik zou graag de certificaten ook op order willen hebben. Dit is de foutmelding (let niet op het domein, deze wordt later vervangen, maar deze had ik toevallig nog vrij)
nginx: [emerg] SSL_CTX_load_verify_locations("/etc/letsencrypt/twinkly.store/chain.pem") failed (SSL: error:02001002:system library:fopen:No such file or directory:fopen('/etc/letsencrypt/twinkly.store/chain.pem','r') error:2006D080:BIO routines:BIO_new_file:no such file error:0B084002:x509 certificate routines:X509_load_cert_crl_file:system lib)
nginx: configuration file /etc/nginx/nginx.conf test failed
Hi mister,
This is my error server.
nginx: [emerg] unknown directive "rtmp_stat" in /etc/nginx/sites-enabled/default:45
nginx: configuration file /etc/nginx/nginx.conf test failed
reg
Hello Artist,
I have followed all the steps and I have gotten this error in the configuration files.
nginx: [emerg] unknown directive "rtmp_stat" in / etc / nginx / sites-enabled / default: 45
nginx: configuration file /etc/nginx/nginx.conf test failed
Hello, all is right if i enter in a http://myurl.com/index.html .... but if go https://www.myurl.com/index.html or https://myurl.com/index.html... it show
ERR_TOO_MANY_REDIRECTS
i made step by step!
Any idea?
Can you tell me what is one line 45 of your config file?
The error that rtmp_stat is not recognized makes me suspect that you don't have the RTMP module installed properly. Did you install the package libnginx-mod-rtmp ?
If not, on ubuntu type: apt install libnginx-mod-rtmp. And then see if it works. Let me know!
I get the error: ERR_TOO_MANY_REDIRECTS. Any help is much appreciated.
In developer mode there are a few 301 and (failed) errors.
Also error: Referrer Policy: no-referrer-when-downgrade
Many thanks for your tutorials! On pay day, I' buy you a pizza (what's on your Pizza? 😉
It´s solved!! Thankss!!
Hi Andre, you're awesome, thank you.
I have ubuntu running on a digital ocean droplet, and my nginx.conf file has the hls files temporarily writing to path /nginx/hls/
however i would like to have t hese files write elsewhere as you recommend, on another drive, but i don't quite understand how to effectively do this. this streaming app i have built for a client, they will use OBS to stream to the digital ocean droplet. so where does another drive come in to temporarily write files to? thank you so. much in advance
Dag André,
Ik heb bovenstaande tutorial volledig gevolgd maar loop tegen een kleinigheidje aan.
Zodra ik de url aanroep krijg ik de melding: De pagina verwijst niet op een juiste manier door
Enig idee wat ik fout doe? Hopelijk kun je me hier mee helpen.
gr Henk
Another good thing I’ve found that offers more then just rtmp is MediaCP.
It’s a control panel for audio streaming but offer rtmp with embedded html code and you can creat services
Search mediacp on google
hi i have changed my hls path to my external usb, but cant get it to play in video.js ? can i have help please
HI i would like to chamge my HLS download path but everytime i route the path to my external hardrive it puts the files into the new folders but i cant get it to display within video.js ?
thanks
Dan
I am having a strange issue and was hoping you could point me in the right direction. I have my GoPro set to stream to rtmp://192.168.5.8/live on my local network. If I open up that network location in VLC I see it streaming just fine. However if I go to http://192.168.5.8 my player loads but never shows any video (just spins). The code looks like this, did I miss something or am I trying to do something that is not possible?
>
Sorry, deleted my code
source src="http://192.168.5.8/live" type="application/x-mpegURL"